
How to Remove a Sliding Door: Removing a sliding door may seem like a daunting task, but with the right tools and a clear understanding of the steps involved, it can be a straightforward DIY project. This guide will take you through the process step-by-step, ensuring you have all the information needed to remove your sliding door safely and efficiently.
Tools and Materials Needed
Before starting, gather the necessary tools and materials:
- Screwdrivers (Phillips and flathead)
- Pry bar
- Utility knife
- Hammer
- Pliers
- Safety gloves and goggles
- Tape measure
- Plastic sheet or tarp (for dust protection)
- Step ladder (if necessary)
- Vacuum or broom (for cleanup)
Safety Precautions
- Wear Protective Gear: Safety gloves and goggles are essential to protect your hands from sharp edges and your eyes from debris.
- Ensure Assistance: Sliding doors are often heavy. Having a helper can prevent injuries and damage to the door or surrounding area.
- Clear the Area: Remove any furniture, rugs, or obstacles around the door to create a safe working space.
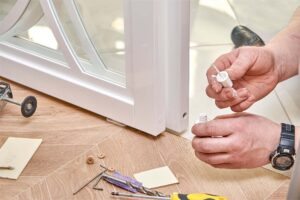
Step-by-Step Guide to Removing a Sliding Door
1. Remove the Door Panel
- Open the Sliding Door: Slide the door fully open to access the screws on the frame.
- Locate and Remove the Screws: Find the screws securing the door to the track. These are usually located at the top and bottom of the door frame. Use a screwdriver to remove these screws.
- Lift the Door: Carefully lift the door upwards to disengage it from the bottom track. You may need to tilt the door slightly to remove it completely. This step often requires assistance due to the door’s weight.
2. Remove the Stationary Panel
- Locate the Retainer Clips: The stationary panel is typically held in place by retainer clips or brackets at the top and bottom of the frame. Locate these clips.
- Unscrew the Retainer Clips: Use a screwdriver to remove the screws holding the retainer clips in place.
- Cut Sealant (if necessary): If there is any sealant around the edges of the stationary panel, use a utility knife to cut through it carefully.
- Slide Out the Panel: Once the retainer clips are removed and the sealant is cut, slide the stationary panel out of the frame.
3. Remove the Track
- Unscrew the Track: The sliding door track is typically screwed into the door frame or floor. Locate and remove these screws with a screwdriver.
- Pry the Track Loose: If the track is secured with adhesive or caulking, use a pry bar to gently lift it away from the frame or floor. Be cautious not to damage the surrounding area.
- Remove the Track: Once the track is free, remove it completely from the door frame or floor.
4. Clean Up and Inspect
- Remove Any Remaining Sealant or Adhesive: Use a utility knife or scraper to remove any remaining sealant or adhesive from the door frame.
- Inspect the Door Frame: Check the door frame for any damage or needed repairs. This is a good time to make any necessary fixes before installing a new door or finishing the area.
- Clean the Work Area: Use a vacuum or broom to clean up any debris, screws, or pieces of the old door and track.
Tips and Considerations
- Documentation: Take photos of the door and its components before starting. This can help during reinstallation or provide a reference if needed.
- Label Parts: As you remove screws, clips, and other parts, label and organize them. This ensures you can easily reassemble if needed.
- Disposal: Plan for the disposal of the old door and track. Some parts may be recyclable, while others may need special handling.
Troubleshooting Common Issues
- Stuck Door Panel: If the sliding door panel is stuck, ensure all screws are removed and try tilting the door at a different angle. Applying a small amount of lubricant to the track can also help.
- Tight Sealant: Use a utility knife with a sharp blade to cut through stubborn sealant. Be patient and work slowly to avoid damaging the frame.
- Heavy Door Panels: Always have an assistant when lifting and removing heavy door panels to prevent injury and damage.
Conclusion
Removing a sliding door involves careful planning, the right tools, and a step-by-step approach. By following this comprehensive guide, you can safely and efficiently remove your sliding door, making way for a new installation or renovation project. Whether you are replacing the door or simply upgrading your space, understanding the removal process is crucial for a successful outcome.
Remember, if at any point you feel unsure or encounter unexpected issues, seeking professional assistance can ensure the job is done correctly and safely
Read Also.Bathtub trip lever not working | Get solution