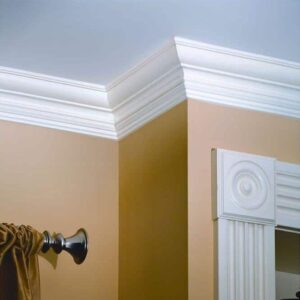
How To Trim Molding for Inside Corners?Trimming moulding for inside corners can be a rewarding yet challenging task. This guide
will provide you with a comprehensive step-by-step process to help you achieve professional-looking results. Here’s how you can trim moulding for inside corners in detail.
Tools and Materials Needed
Before starting, gather the following tools and materials:
Measuring tape
Pencil
Mitre saw
Coping saw
Sandpaper or sanding block
Wood glue or finishing nails
Hammer or nail gun
Safety goggles
Dust mask
Carpenter’s square
Moulding
Step-by-Step Guide
1. Measure the Inside Corner
Begin by measuring the inside corner where the moulding will be installed. Use a measuring tape to determine the length of the walls. Note down the measurements accurately.
2. Cutting the First Piece
The first piece of moulding can be a straightforward cut. Place the moulding in the mitre saw with the back flat against the fence. Set the mitre saw to 45 degrees. Cut the moulding at a 45-degree angle, ensuring the cut end will fit snugly into the corner.
3. Cutting the Second Piece
The second piece is where the real skill comes in, as it requires a coping cut to fit perfectly against the first piece. Here’s how to do it:
Step-by-Step Coping:
Start by cutting a 45-degree angle on the end of the second piece of moulding. This will provide the outline you need for the coping cut.
- Tracing the Profile:
With the cut piece in hand, use a pencil to trace the edge of the moulding’s profile. This trace will guide your coping cut.
- Coping with a Coping Saw:
Secure the moulding piece on a workbench. Using a coping saw, carefully cut along the traced line. Hold the saw at a slight angle to remove more material from the back of the moulding, ensuring a tight fit.
This process is known as back-cutting.
- Test the Fit:
Test fit the coped piece against the first piece. The coped end should fit snugly over the profile of the first piece. Make adjustments as necessary by sanding or further cutting.
4. Sanding the Edges
After cutting, smooth the edges with sandpaper to ensure a tight, clean fit. This will help the pieces join seamlessly without gaps.
5. Installing the Moulding
With both pieces cut and fitted, it’s time to install the moulding.
- Applying Adhesive:
Apply wood glue to the back of the moulding pieces if you prefer a glued installation.
- Nailing the Molding:
Alternatively, you can use finishing nails. If using nails, pre-drill small holes to prevent the wood from splitting.
- Securing the First Piece:
Place the first piece of moulding into the corner and secure it with nails or glue. Use a hammer or nail gun for this step. Make sure it’s level and aligned correctly.
- Securing the Second Piece:
Fit the coped piece against the first piece and secure it similarly. Ensure the joints are tight and there are no gaps.
6. Finishing Touches
To give the moulding a professional finish:
- Fill Nail Holes:
Use wood putty to fill any nail holes. Let it dry, then sand smooth.
- Caulk the Joints:
Apply caulk to any gaps between the moulding and the wall to create a seamless look. Smooth the caulk with a wet finger or caulk smoothing tool.
- Painting or Staining:
Finally, paint or stain the moulding to match your decor. If you’re painting, use a high-quality paintbrush or painter’s tape to protect adjacent surfaces.
Tips for Success
Accuracy is Key: Always double-check your measurements before cutting. Even a small mistake can result in a poor fit.
Practice Makes Perfect: If you’re new to coping, practice on a scrap piece of moulding before working on your actual pieces.
Use the Right Tools: A sharp mitre saw and a quality coping saw will make the job easier and produce cleaner cuts.
Safety First: Always wear safety goggles and a dust mask when cutting moulding to protect your eyes and lungs from sawdust.
Common Mistakes to Avoid
Incorrect Measurements: Miscalculating the angles or lengths can lead to gaps. Always measure twice and cut once.
Improper Tool Use: Using a dull saw blade can result in rough, inaccurate cuts. Ensure your tools are in good condition.
Skipping Sanding: Not sanding the coped edge can prevent a tight fit. Take the time to smooth out your cuts.
Poor Adhesion: If you’re using glue, make sure to apply it evenly and press the moulding firmly against the wall.
Troubleshooting Tips
Gap at the Joint: If there’s a gap, check if the coped piece is cut correctly. Sand or re-cut as necessary to achieve a better fit.
Uneven Walls: Older homes often have uneven walls, which can affect the fit of the moulding. Use caulk to fill any small gaps and ensure a seamless appearance.
Moulding Doesn’t Sit Flush: If the moulding doesn’t sit flush against the wall, there might be a bump or obstruction. Sand or trim the area to ensure a snug fit.
Conclusion
Trimming moulding for inside corners requires precision and patience, but with the right tools and techniques, you can achieve a professional result. Remember to measure carefully, cut accurately, and take your time with the coping process. With practice, you’ll master this skill and be able to tackle any moulding project with confidence.
Read Also.how long does it take to drain a water heater?