Best Tile Floor Underlayment Options | How to use them .Tile floor underlayment is an essential component in creating a durable and smooth tile surface.
It provides a stable base, helps with moisture control, and can improve the longevity of your tile installation. Here’s a comprehensive guide to the best tile floor underlayment options and how to use them.
Types of Tile Floor Underlayment
- Cement Backer Board (Cement Board)
- Foam Backer Board
- Uncoupling Membranes
- Plywood
- Self-Leveling Underlayment
- Cork Underlayment
- Peel-and-Stick Membranes

1. Cement Backer Board (Cement Board)
Description: Cement backer board is a rigid substrate made from cement and fiberglass mesh. It is moisture-resistant and provides a stable base for tile.
Advantages:
- Highly durable
- Excellent moisture resistance
- Provides a smooth surface for tiling
- Easy to cut and install
How to Use:
- Preparation: Ensure the subfloor is clean and free of debris.
- Cutting: Use a carbide-tipped scoring tool to cut the cement board to size.
- Installation: Lay the cement board over the subfloor, leaving a 1/8-inch gap between the boards and around the perimeter.
- Fastening: Secure the cement board with cement board screws, spacing them 6-8 inches apart.
- Sealing Joints: Apply fiberglass mesh tape over the seams and cover with thin-set mortar to smooth the surface.
2. Foam Backer Board
Description: Foam backer board is lightweight and made from extruded polystyrene foam covered with a thin layer of cementitious coating.
Advantages:
- Lightweight and easy to handle
- Provides excellent insulation
- Moisture-resistant
- Easy to cut with a utility knife
How to Use:
- Preparation: Ensure the subfloor is clean and level.
- Cutting: Cut the foam backer board to size using a utility knife.
- Installation: Lay the foam backer board on the subfloor.
- Fastening: Secure the board with thin-set mortar or construction adhesive, followed by screws and washers designed for foam board.
- Sealing Joints: Tape the seams with fiberglass mesh tape and cover with thin-set mortar.
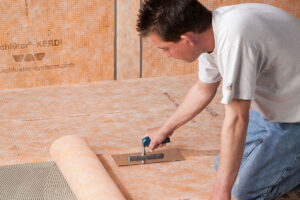
3. Uncoupling Membranes
Description: Uncoupling membranes are made from polyethylene and have a grid structure. They prevent tiles from cracking due to subfloor movement.
Advantages:
- Prevents cracks from transferring to tiles
- Waterproof
- Easy to install
- Thin profile
How to Use:
- Preparation: Ensure the subfloor is clean and level.
- Cutting: Cut the membrane to fit the area using scissors or a utility knife.
- Installation: Spread thin-set mortar on the subfloor using a notched trowel.
- Laying Membrane: Press the membrane into the mortar while it’s still wet, ensuring full contact.
- Sealing Joints: Overlap or tape the seams as recommended by the manufacturer.
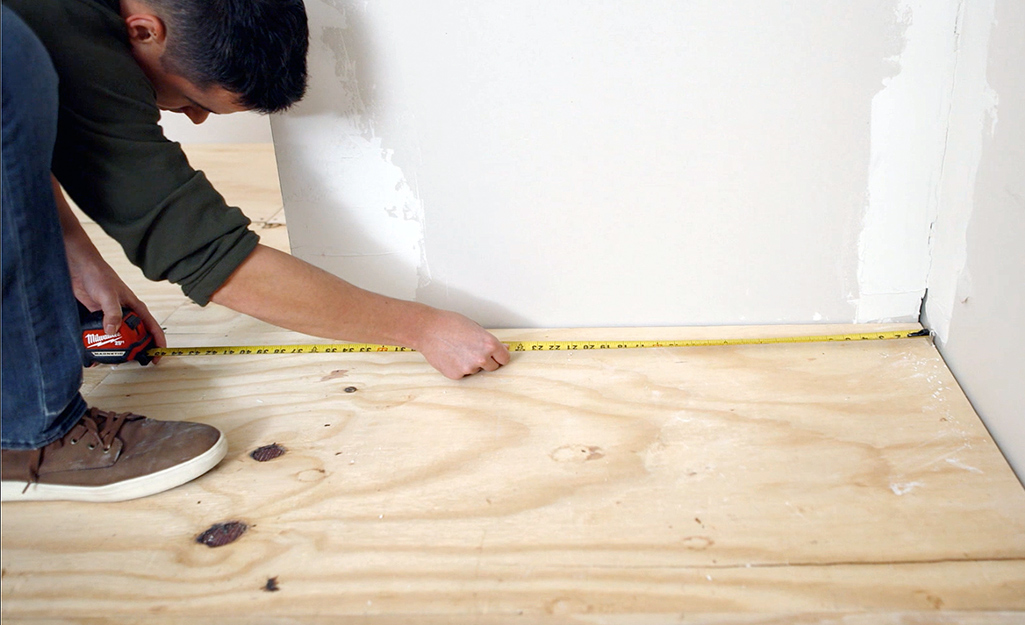
4. Plywood
Description: Plywood is a traditional underlayment material, often used over wooden subfloors to provide a stable base for tile.
Advantages:
- Readily available
- Provides a smooth surface
- Cost-effective
How to Use:
- Preparation: Ensure the subfloor is clean and free of debris.
- Cutting: Cut the plywood to fit the area.
- Installation: Lay the plywood over the subfloor, leaving a 1/8-inch gap between sheets and around the perimeter.
- Fastening: Secure the plywood with screws, spacing them 6-8 inches apart.
- Sealing Joints: Apply a primer or thin-set mortar over the joints to prevent movement.
5. Self-Leveling Underlayment
Description: Self-leveling underlayment is a cement-based compound that levels itself when poured over a subfloor.
Advantages:
- Creates a perfectly level surface
- Quick installation
- Suitable for uneven subfloors
How to Use:
- Preparation: Clean the subfloor and apply a primer if recommended by the manufacturer.
- Mixing: Mix the self-leveling compound according to the manufacturer’s instructions.
- Pouring: Pour the compound over the subfloor and spread with a long-handled squeegee.
- Leveling: Allow the compound to level itself and dry completely before tiling.
6. Cork Underlayment
Description: Cork underlayment is made from natural cork and provides sound insulation and cushioning under tile floors.
Advantages:
- Excellent sound insulation
- Eco-friendly
- Provides cushioning and reduces stress on tiles
How to Use:
- Preparation: Ensure the subfloor is clean and dry.
- Cutting: Cut the cork underlayment to fit the area.
- Installation: Lay the cork underlayment over the subfloor, using adhesive to secure it.
- Sealing Joints: Tape the seams with manufacturer-recommended tape to prevent movement.
Read Also. Everything You Need to Know About “Pool’s Main Drain”